Creating and Importing an Adapter for a BMC Portal Solution


Creating and Importing an Adapter for a BMC Portal Solution |
|
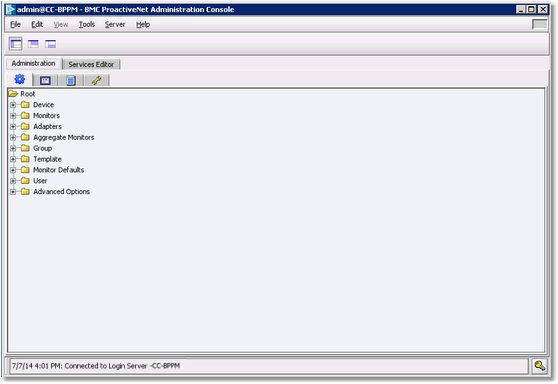
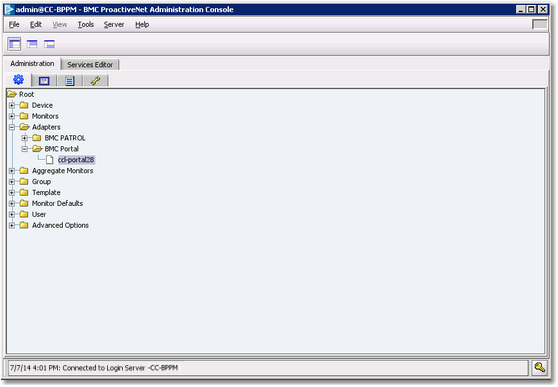
Creating an Adapter for a BMC Portal Solution1.Open the BMC ProactiveNet Administration Console. The BMC ProactiveNet Administration Console is displayed as shown in the following figure:
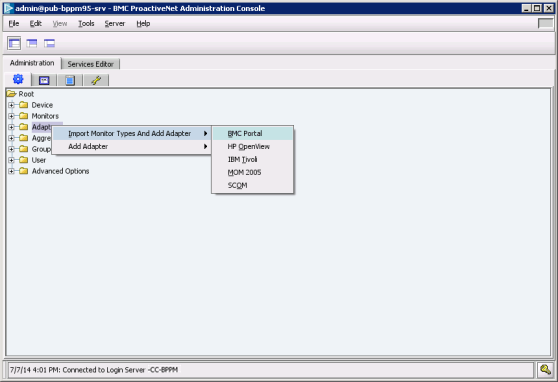
Accessing the Administration tab in the Administration Console 2.Right-click the Adapters folder and select Import Monitor Types and Add Adapter > BMC Portal.
Importing Monitor Types and Adding Adapter 3.In the Configuration tab, enter the required information:
Setting the connection parameters ●In the Instance Name field, enter a name for this instance of the Adapter that will perform the integration of the ‘targeted PM’ into BMC ProactiveNet. ●Select the Agent where this instance of the Adapter will be executed ●Enter the required information to connect to BMC Portal: BMC Portal Host Name or IP address, Port, BMC Portal User Name and Password
●Enter the required information to connect to BMC Portal Datastore: BMC Portal Datastore Host Name or IP address, Port, and credentials 4.Click Next to continue
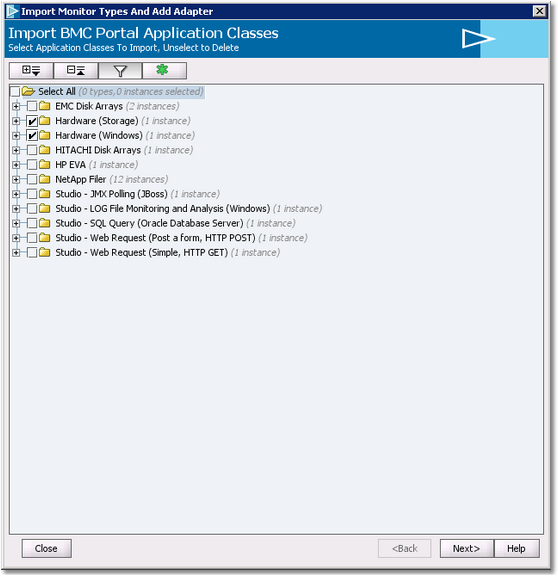
5.Select the application class(es) to import and click Next 6.Set the Filter details if needed.
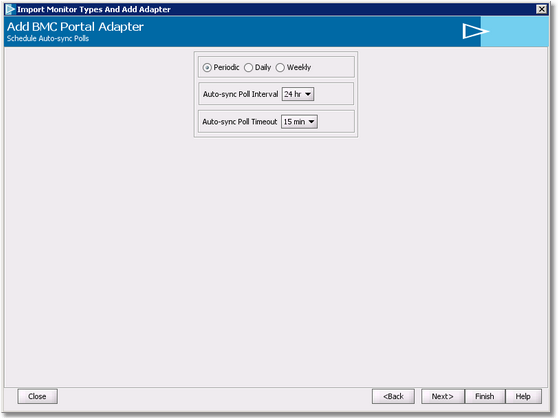
Setting filter details 7.Click Next to Continue. 8.Set the Auto-sync poll scheduling, if needed.
Scheduling Auto-sync polls 9.Click Next to continue. The system displays a summary of your settings, click Finish to confirm. The Adapter has been added to the Adapters folder of the Administration Console.
10.To see the class instances that have been imported by the Adapter, expand the Adapters folder, right-click the Adapter and select Details.
Once created and imported, the Adapter will be displayed in the Devices folder of the BMC ProactiveNet Operations Console.
|