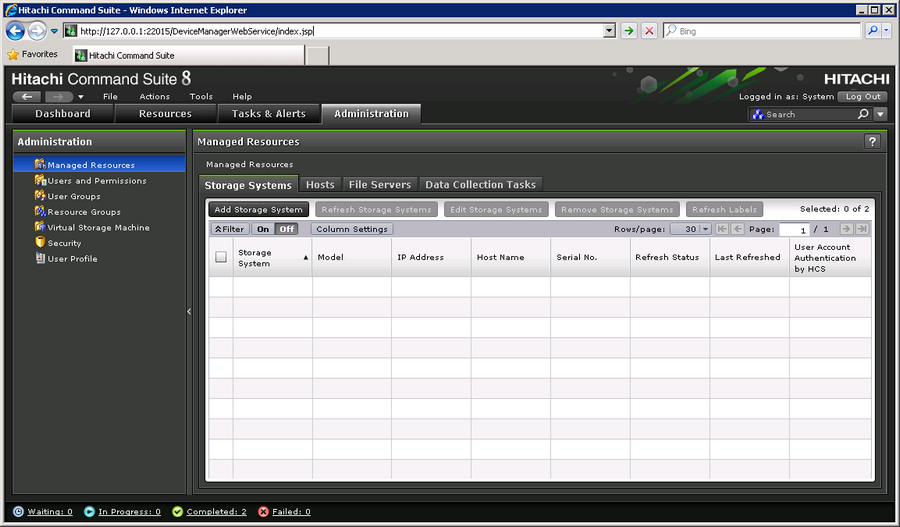
| 1. | Log into the Hitachi Command Suite Console: http://<IP_Address>:22015/DeviceManagerWebService/index.jsp |
| 2. | Click the Add Storage System button located under the Administration > Storage Systems tabs: |
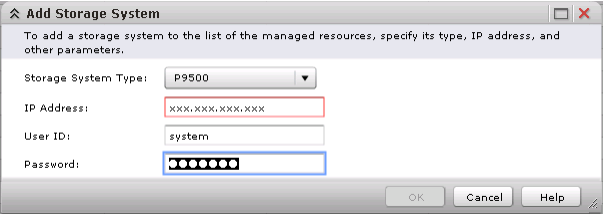
| 3. | Select the Storage System Type. |
| • | For Hitachi Series Storage System (VSP / USP-V), provide the IP address and Credentials: |
| • | For Hitachi Series Storage System (AMS), provide the Controller’s IP addresses and Credentials: |
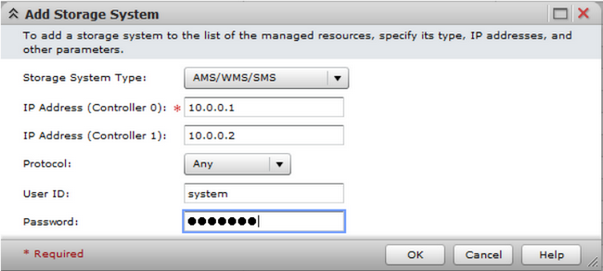
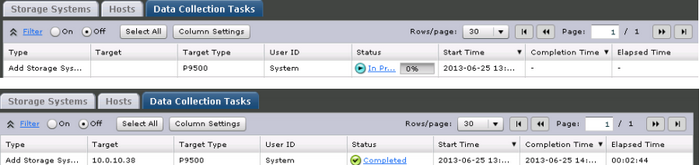
| 4. | Click OK. A Data Collection Task will be generated to add the Storage System. Click View Task Status for details. |
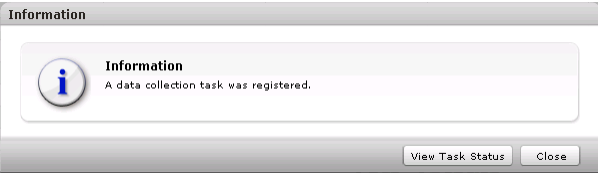
| 5. | Wait for the Data Collect Task to complete successfully. |
| 6. | (USP-V and VSP only) Create the Administrative LUN: |
| • | Click the Resources tab. |
| • | Expand all storage systems and select the recently added storage system. |
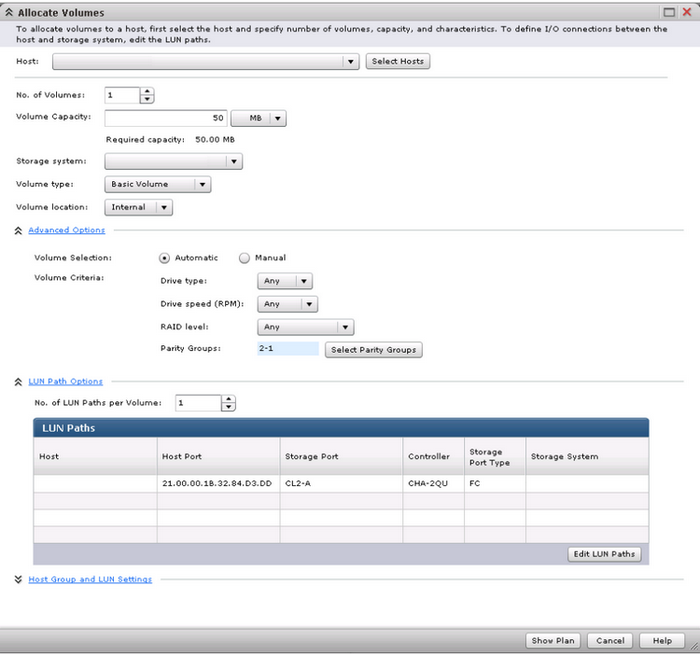
| • | Under General Tasks, select Allocate Volume and fill the fields as follows: |
| ▪ | Host: for Physical Servers, the name of the host where CVAE is installed; for Virtual Servers on ESX host, the name of the ESX host server. |
| ▪ | Size: Can be as small as 50MB since this LUN will not actually have data. |
| ▪ | VolumeType: Basic Volume |
| • | Verify that the allocation task has completed correctly: |

| 7. | Make the Volume/LUN a Command Device: |
| • | Log into the Storage System. |
| • | Expand the Storage System folder and select Logical Devices. |
| • | Select the Logical Device (LUN / Volume) that you want to make a Command Device. |
| • | Click More Actions > Edit Command Devices. |
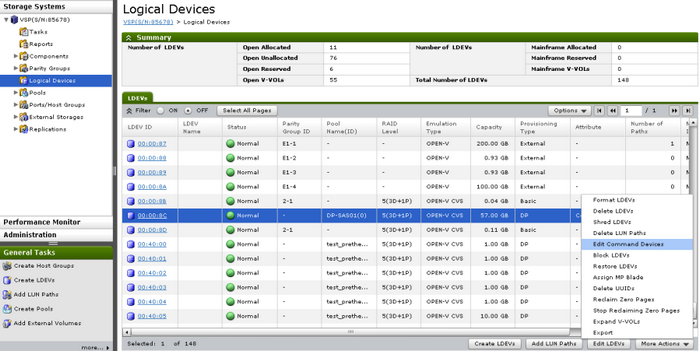
| 8. | Enable the logical device as a Command Device: |

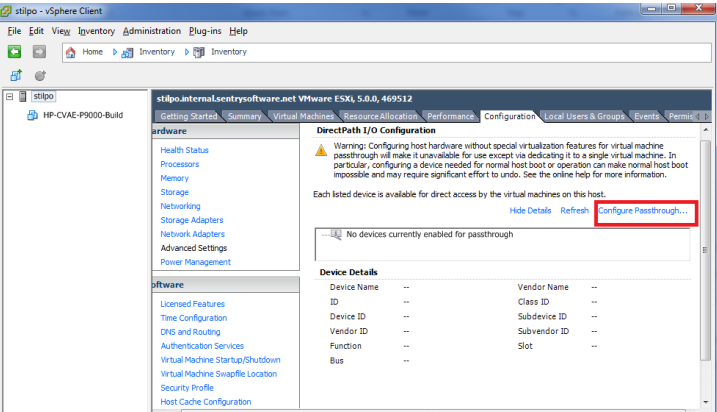
| 9. | (Virtual Machines on ESX hosts only / For physical hosts, skip this section) Raw Device Mapping or LUN allocation will not work for Virtual Machines on ESX Hosts. The HBA port or HBA Card must be allocated directly to the VM. The server needs to be vt-d compatible and have sufficient free HBA ports for each instance of the SMI-S provider you require.
To allocate a port for passthrough: |
| • | Under the ESX Host’s Configuration tab, select Advanced Settings and click Configure Passthrough: |
| • | Select the HBA port(s) that you wish to allocate to VMs: |
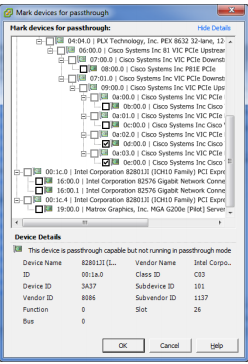
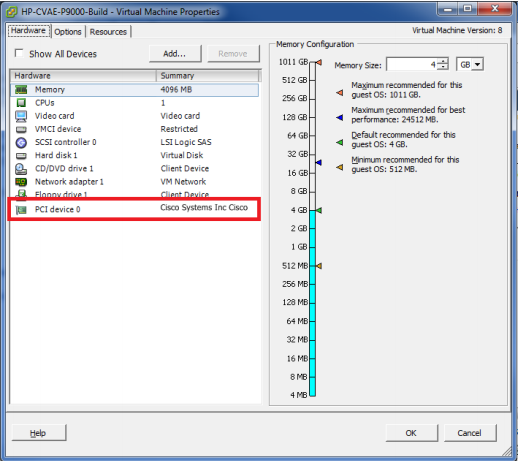
| • | Add the HBA ports to the Virtual Machine: |
| • | Once the VM or Physical server sees the LUN, Windows should find a new hard drive: |
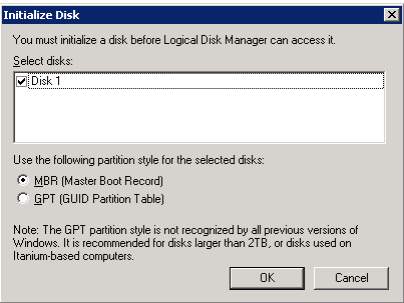
| • | Click OK to create an MBR (Master Boot Record). |
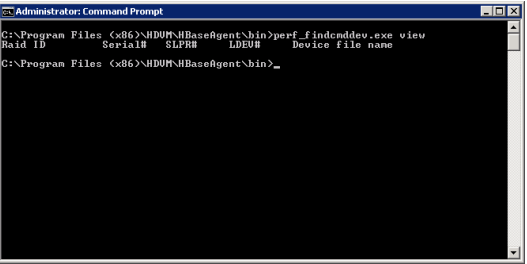
| • | Run the following command:
C:\Program Files (x86)\HDVM\HBaseAgent\bin>perf_findcmddev.exe view |
| • | If the Storage System does not appear, run:
C:\Program Files (x86)\HDVM\HBaseAgent\bin\hldutil |
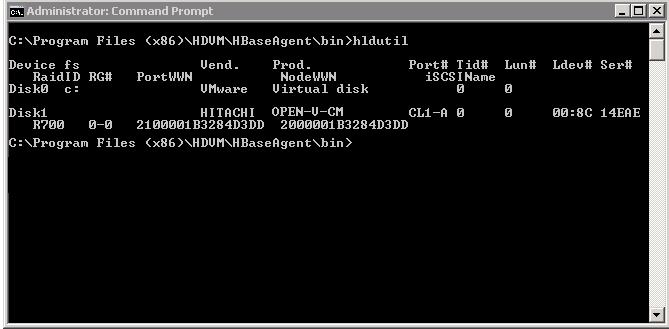
| • | Refer to the RAID ID Translation Table below to find the OPEN-V-CM (command device LUN) for the storage system: |
| 10. | Edit the file: C:\Program Files (x86)\HDVM\HBaseAgent\mod\hdvm\config\type perf_cmddev.properties |
| 11. | Translate the information from hldutil to perf_cmddev.properties |
Disk1 HITACHI OPEN-V-CM CL1-A 0 0 00:8C 14EAE
R700 0-0 2100001B3284D3DD 2000001B3284D3DD
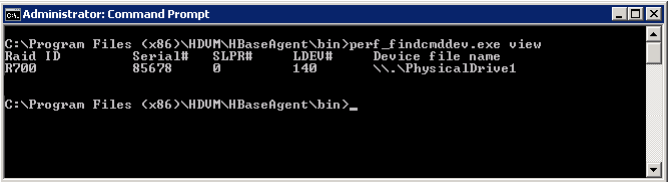
R700.85678.0.140 : \\.\PhysicalDrive1
The Disk Number and Model number can be copied directly.
The Serial, CU, and LDEV Number need to be translated from HEX to Decimal.
| • | Run perf_findcmddev view to check configuration: |
| • | Run perf_findcmddev verify to ensure configuration is valid: |
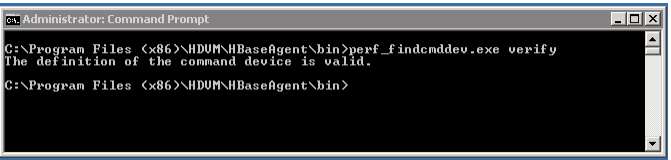
| • | The verify command will highlight any invalid or non-functional lines in the configuration: |
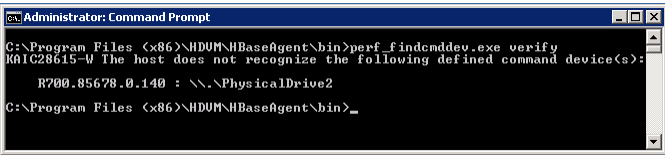
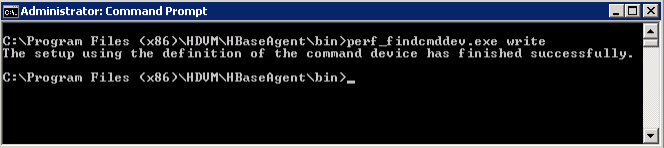
| • | If the configuration is valid, use the perf_findcmddev write command to save the configuration. Any invalid configuration lines (such as PhysicalDrive2 in the example above will be removed from the configuration by the write command. |
| 12. | Configure the Hitachi Command View server to use the agent: |
| • | Edit Hitachi\HiCommandServer\config\server.properties |
| • | Search for the following line: |
# host name for the CIM agent
server.cim.agent=
| 13. | Add the hostname for the CIM agent. The hostname should be the short, non-FQDN of the server: |
# host name for the CIM agent
server.cim.agent=Hitachi-SMIS
| 14. | If the server is the same as the agent (by default), take the hostname from the server variable: |
server.http.host= Hitachi-SMIS
| 15. | Restart the Server (or restart all Hitachi Services). |
| 16. | Log into Hitachi Command View Server after reboot to ensure that it is working. |
|


