|
Installing Monitoring Studio KM for PATROL is an automated process managed by a wizard. The wizard goes through the necessary steps to properly install Monitoring Studio and all files associated with it. You are simply prompt for the product's folder location and the product/components to install. Browse to the bmc_products folder where the files have been extracted (both Monitoring Studio and the Common Installer).
| • | On Windows: Launch the setup.exe program. |
| • | On UNIX: Launch the setup.sh script |
On the more recent versions of Windows, you may get this security alert dialog: Windows detected that the BMC Software Installation Utility is listening on the 50001 port.
To install Monitoring Studio KM for PATROL
1. Allow the perl.exe program to listen on this port: Click Allow access.
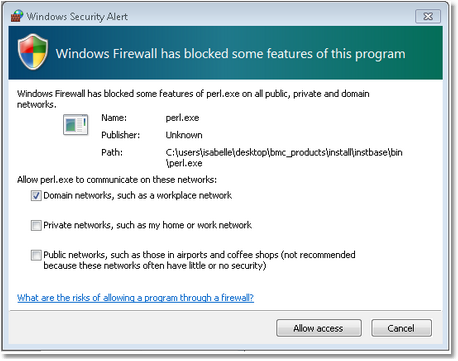
Installation Wizard - Step 1: Windows Security Alert
| 2. | The welcome screen of the installer appears. Click Next to continue. |
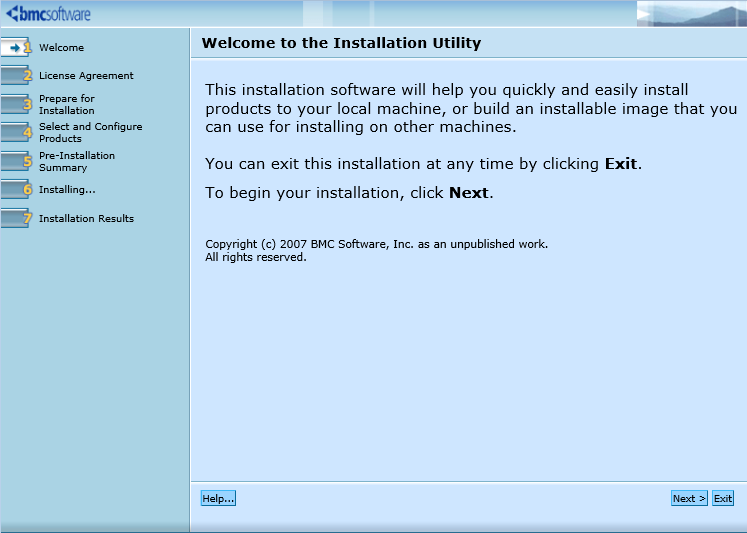
Installation Wizard - Step 2: Welcome
| 3. | Read the license agreement, click the Accept option and then click Next to continue. |

Installation Wizard - Step 3: Reviewing License Agreement
| 4. | Select Install products on this computer now and click Next to continue. |
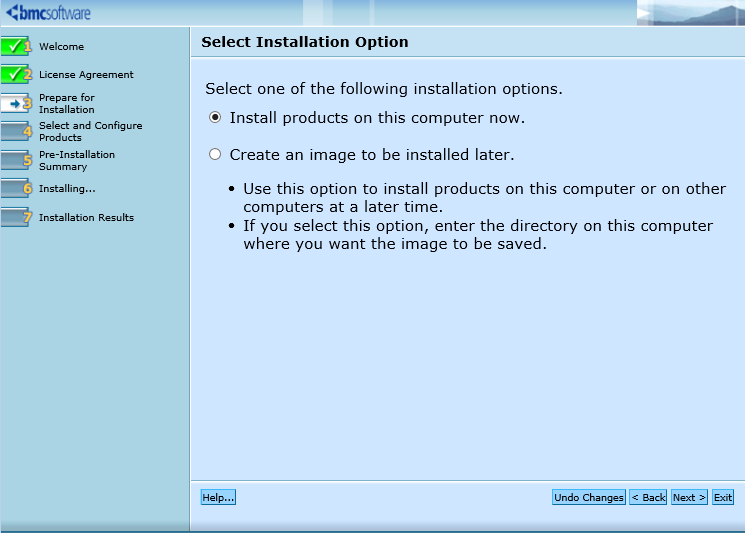
Installation Wizard - Step 4: Selecting Installation Options
| 5. | Specify the BMC Software products folder. See the BMC Software documentation for more information about the BMC Software products folder. Click Next to continue. |
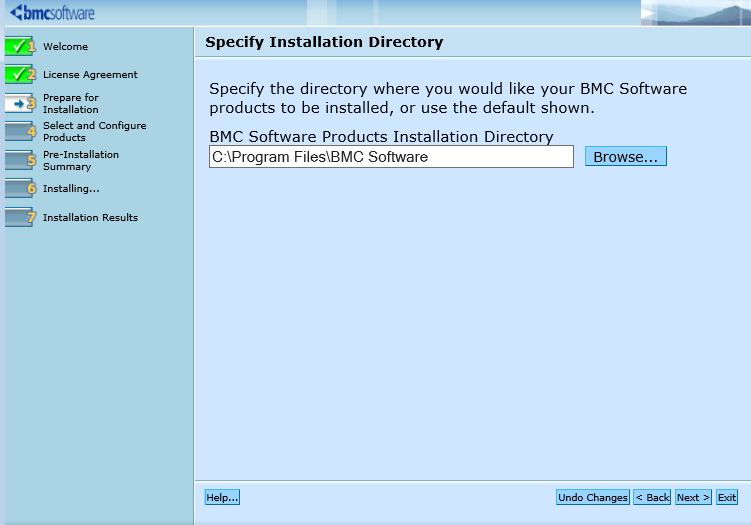
Installation Wizard - Step 5: Selecting the Installation Directory
| 6. | Select Default. Installing Monitoring Studio does not require any customization. Click Next to continue. |
Installation Wizard - Step 6: Selecting an Installation Type
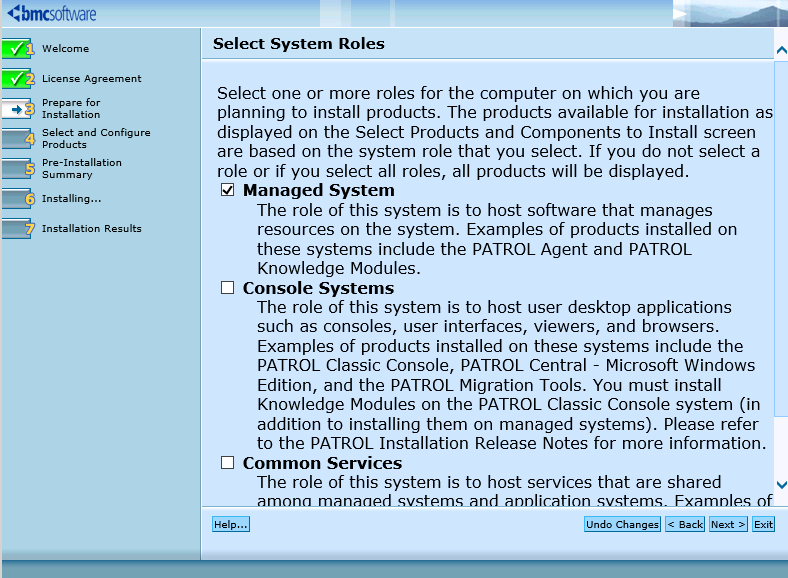
| • | Managed System to install Monitoring Studio on a PATROL Agent. |
| • | Console Systems to install Monitoring Studio on a PATROL Classic Console. |
| • | Common services to install Monitoring Studio on the Console Server or on PATROL Central – Web Edition.
Click Next to continue. |
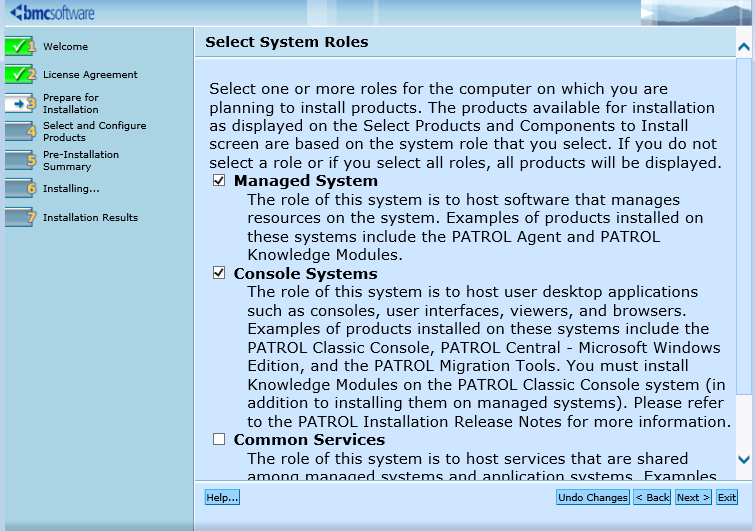
Installation Wizard - Step 7: Selecting Roles
| ▪ | Monitoring Sentry KM for PATROL to install the KM (it should be selected by default). |
| ▪ | Java Runtime Environment program if you want to install it along with the KM (this option is only provided when you have previously downloaded the package).
Click Next to continue. |
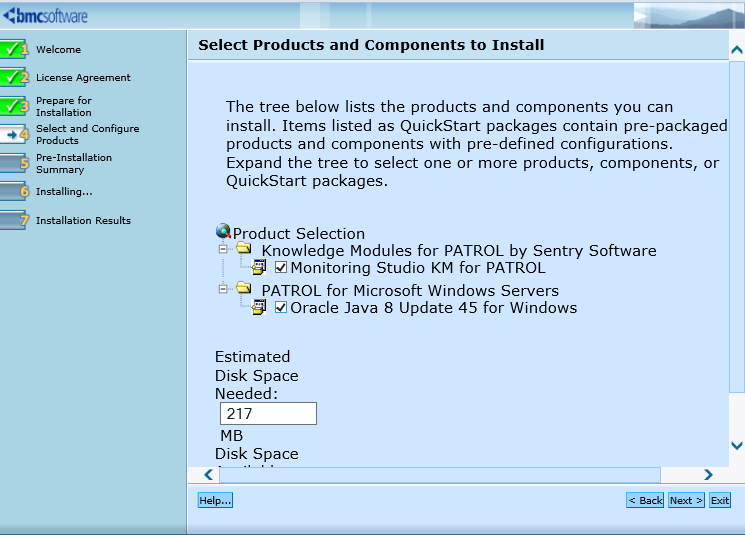
Installation Wizard - Step 8: Selecting Products and Components
| 9. | Provide the PATROL 3.x Product Directory and click Next to continue. |
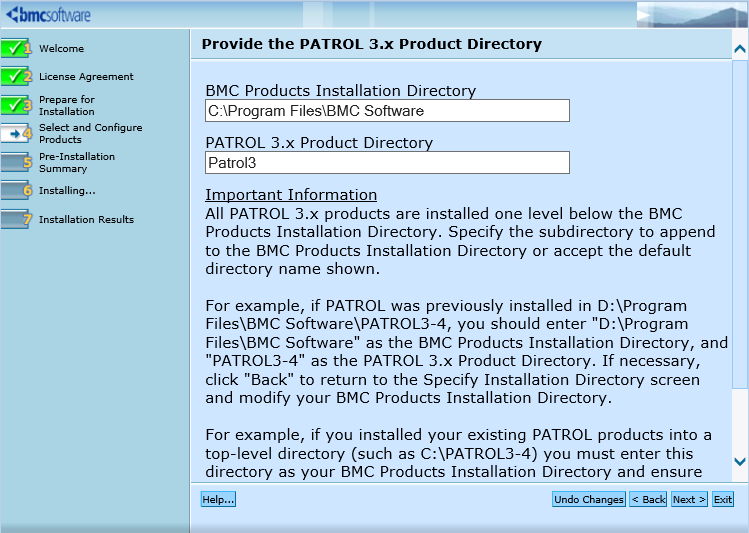
Installation Wizard - Step 9: Providing the PATROL 3.x Product Directory
| 10. | Confirm the BMC product startup information |
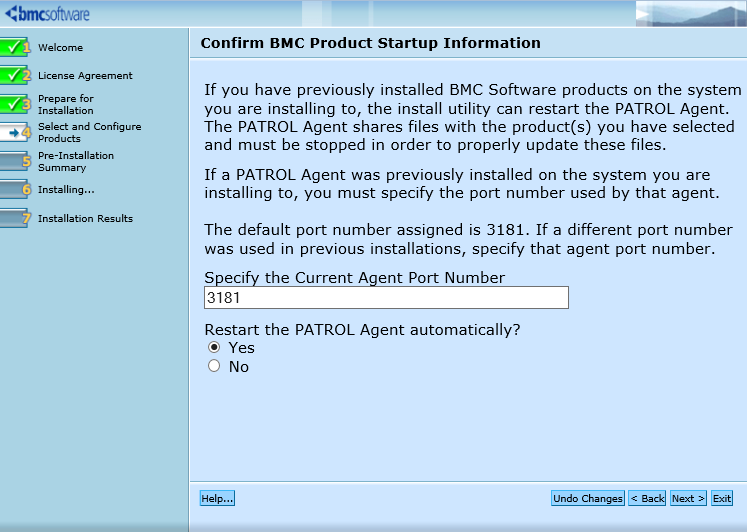
Installation Wizard - Step 10: Confirming BMC Product Startup Information
| 11. | Review the installation parameters and click Start Install to launch the installation procedure. |
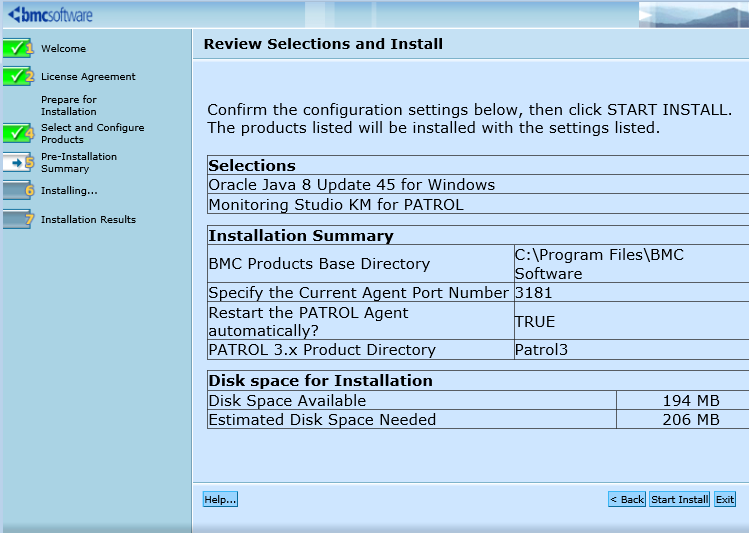
Installation Wizard - Step 11: Reviewing Installation Options
| 12. | The setup program displays the actions performed and indicates the percentage of completion. Once the installation complete, click Next the view the installation results. |
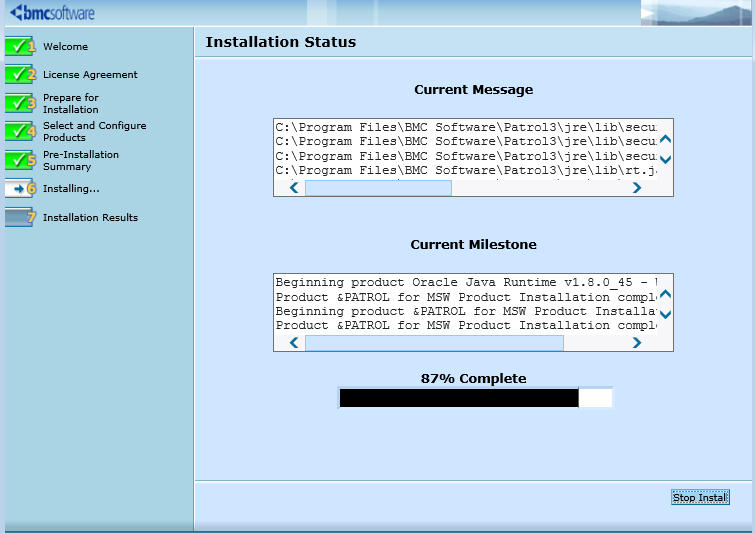
Installation Wizard - Step 12: Installation Status
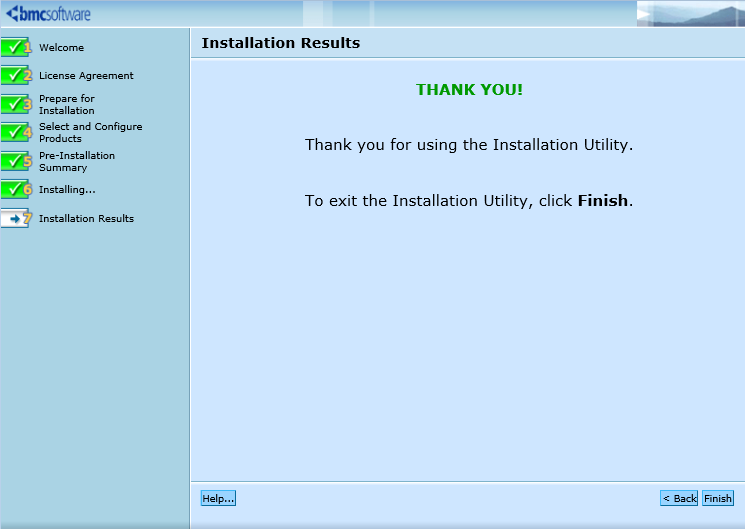
| 13. | The wizard displays the installation results.
Click View Log to display a detailed log of the installation procedure. Click Next and then Finish to exit the setup program. |
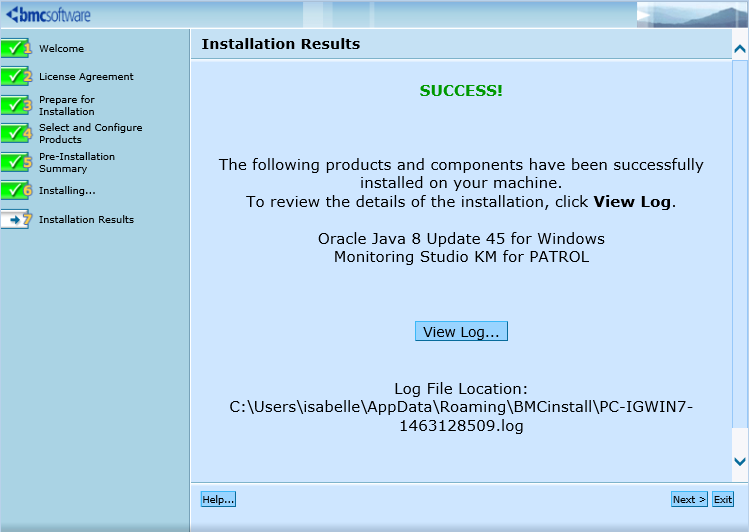
Installation Wizard - Step 13: Installation Results
| 14. | Click the Finish button to quit the installation wizard. |
Installation Wizard - Step 14: Completing and closing the Installation Wizard.
See Also
Extracting setup files
Requirements
Installing Monitoring Studio
Installation
| 

