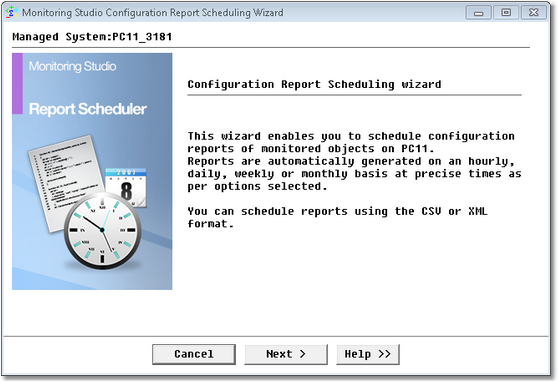
Scheduling Configuration Reports


Scheduling Configuration Reports |
|
|
To schedule a report:
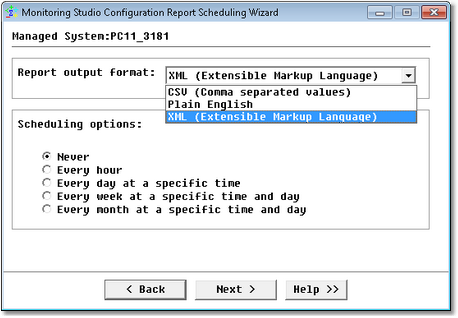
Report Scheduler Wizard — Scheduling Options Page
Every hourReport Scheduler Wizard — Every Hour Option
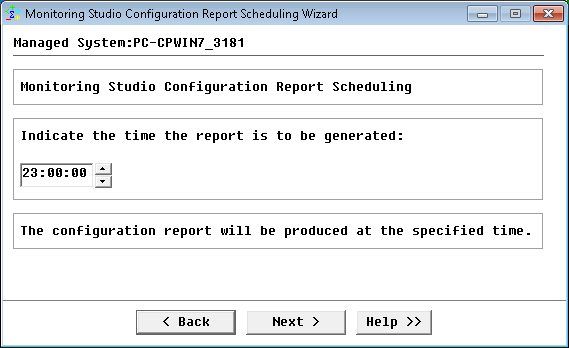
Click Next to continue. The last step of the Configuration Report Scheduling Wizard confirms the specified settings. Click Finish to close the wizard. Every day at a specific timeIndicate the time at which the report is to be generated.
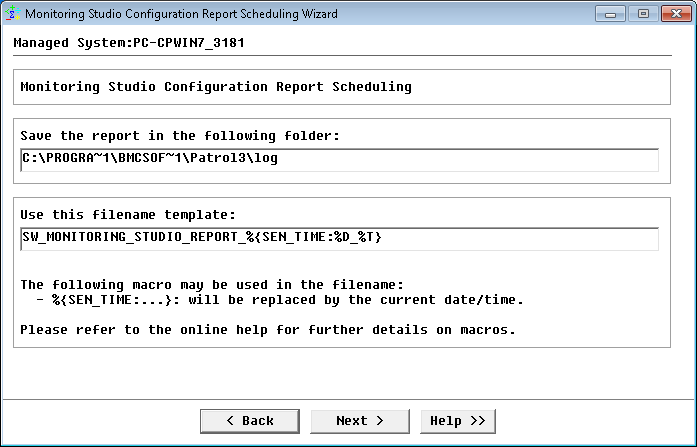
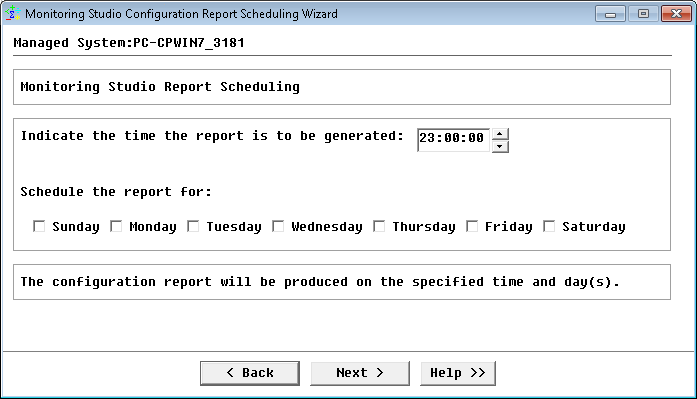
Report Scheduler Wizard — Every Day at a Specific Time Option Click Next. The Settings Panel is displayed to allow you to define the folder in which the file must be saved, the filename template you wish to use. Proceed with the appropriate settings and click Next to continue. The last step of the Configuration Report Scheduling Wizard confirms the specified settings. Click Finish to close the wizard. Every week at a specific time and daySelect the time and the day(s) of the week on which the report is to be generated.
Click Next. The Settings Panel is displayed to allow you to define the folder in which the file must be saved, the filename template you wish to use. Proceed with the appropriate settings and click Next to continue. The last step of the Configuration Report Scheduling Wizard confirms the specified settings. Click Finish to close the wizard.
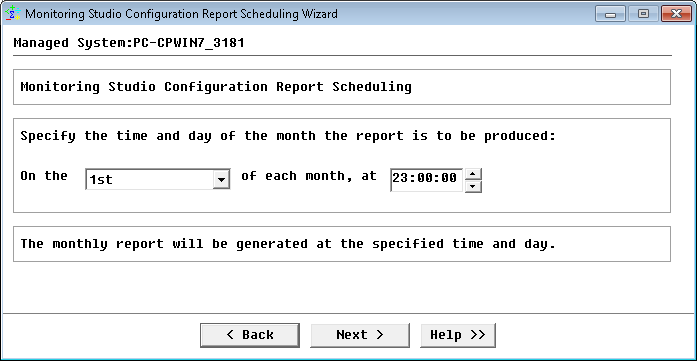
Every month at a specific time and dayIndicate the day of each month and the time at which the report is to be generated.
Click Next. The Settings Panel is displayed to allow you to define the folder in which the file must be saved, the filename template you wish to use. Proceed with the appropriate settings and click Next to continue. The last step of the Report Scheduler Wizard confirms the specified settings. Click Finish to quit the wizard. See Also
|