Installation Procedure


|
Installation Procedure |
|
|
1.Place BPM-Express-for-Hardware-<version>.par file in a known location on your file system. 2. Log on to BMC Portal with super-administrator credentials.
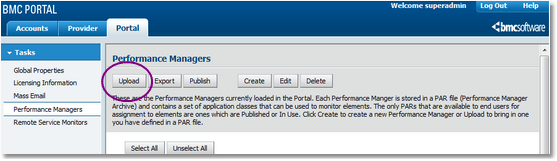
3.Click the Portal tab. Under Tasks in the left pane, select Performance Managers to open the Performance Managers page and then click Upload.
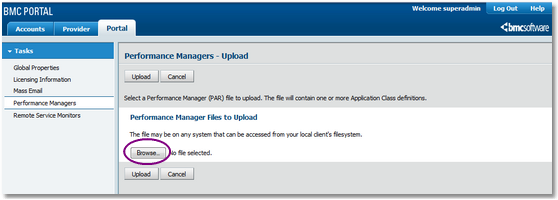
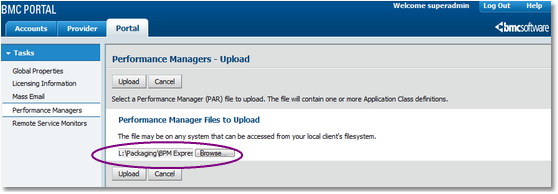
Uploading Performance Managers 4.Click Browse to open a file selection dialog box, select the file BPM-Express-for-Hardware-<version>.par and click Open.
Locating the .par file 5.Click Upload. The Portal uploads the PAR file to the database, and you should see BPM Express for Hardware in the list of Performance Managers as Published, which means it is installed.
BPM Express for Hardware appears as Published 6.The “+” symbol next to BPM Express for Hardware indicates that there are several application classes within the main PM (Performance Manager). Expand the tree to see the platform-specific application classes of BPM Express for Hardware: Hardware (OpenVMS); Hardware (Switch); Hardware (Windows); Hardware (Other); Hardware (HP-UX); Hardware (AIX); Hardware (Tru64); Hardware (Storage); Hardware (Solaris); Hardware (Linux). The PM is built with separate platform-specific classes since the input properties required to activate the class vary from one platform to another. For details, see: Adding BPM Express for Hardware to an Element Profile.
The installation of BPM Express for Hardware is now complete. If a previous version was already installed, the PM is automatically upgraded. To begin using the performance manager, log out and then log in again, this time, with user credentials. You are now ready to begin using the PM. Related Topics Adding the Hardware Application Class to an Element Profile Adding the Hardware Application Class to an Existing Element |