|
The File Security Check tool offers a complete file monitoring by ensuring that file security is respected. With a few clicks, you can monitor the access and rights of groups and users and define who should be alerted if the file content is changed or if security is breached.
File Security Check objects are instances of the SW_FILE_SECURITY class.
Step 1: Creating a File Security Monitoring
| 1. | In the PATROL Console, right-click the File Monitoring icon and select KM Commands > New > File security check... |
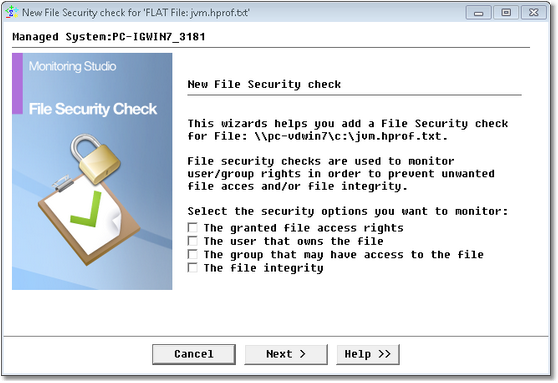
File Security Check Wizard — Welcome Page
| 2. | Select the security options that you want to monitor: |
 By default, Monitoring Studio will use the current file attributes and owners in the next steps. If the current file configuration is the correct one, simply click on Next until the end of the wizard. By default, Monitoring Studio will use the current file attributes and owners in the next steps. If the current file configuration is the correct one, simply click on Next until the end of the wizard.
Step 2: File’s access rights
The following dialog box will only be displayed if you previously selected the security option The granted file access rights. It will let you select the type of alert to be triggered if the file’s access rights do not match the criteria entered. Depending on the operating system the PATROL agent is running on, you may get different options.
On UNIX and Linux systems
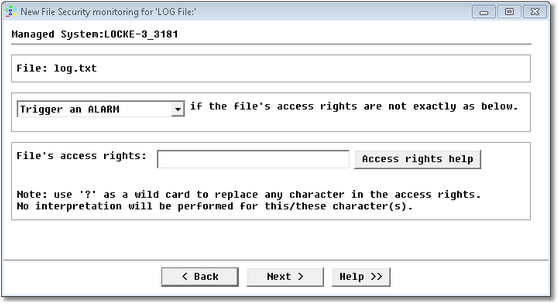
Windows Service Monitoring Wizard — File Access Rights on UNIX/Linux Systems
| 1. | In the first drop-down list, choose the type of alert to be triggered if the current file mode does not match the "expected" one. |
| 2. | Specify the file's access rights. They can be looked up by executing an "ls –l" command. The mode consists of 10 characters, for example, -rwxr-xr-x. The first character indicates the entry type: |
| ▪ | c: character special file |
| ▪ | p: fifo (also called a \"named pipe\") special file |
The next 9 characters are interpreted as three sets of three characters, each of which identifies access and execution permissions for the owner, group, and others categories.
The" – "indicates that permission is not granted. Various permission combinations are possible, except that the x, s, S, t, and T characters are mutually exclusive.
The access right characters are interpreted as follows:
| • | -: Deny all permissions in the corresponding position. |
| • | r: Grant read permission to the corresponding user class. |
| • | w: Grant write permission to the corresponding user class. |
| • | x: Grant execute (or search in directory) permission to the corresponding user class. |
| • | s: Grant execute (search) permission to the corresponding user class. Execute the file as if by the owner (set user ID, SUID) or group (set group ID, SGID), as indicated by position. |
| • | S: Deny execute (search) permission to the corresponding user class. Execute the file as if by the owner (set user ID, SUID) or group (set group ID, SGID), as indicated by position. |
| • | t: Grant execute (search) permission to others. The "sticky" (save text image) bit is set. |
| • | T: Deny execute (search directory) permission to others. The "sticky" (save text image) bit is set. |
On Windows systems
The file access rights depend on the Access Control List (ACL) on Windows systems. An ACL is a table that tells a computer operating system the access rights each user has to a particular system object, such as a file directory or individual file. Each object has a security attribute that identifies its access control list. The list has an entry for each system user with access privileges. The most common privileges include the ability to:
| • | Read a file (or all the files in a directory) |
| • | Write to the file or files |
| • | Execute the file (if it is an executable file, or program). |
In Windows, an access control list is associated with each system object.
| • | Each ACL has one or more access control entries (ACEs) consisting of the name of a user or group of users. |
| • | The user can also be a role name, such as "programmer," or "tester." |
| • | For each of these users, groups, or roles, the access privileges are stated in a string of bits called an access mask. |
Generally, the system administrator or the object owner creates the access control list for an object.
In the above dialog box, you can:
| • | Enter up to 8 users or groups |
| • | Indicate the access criteria: read, write or execute |
| • | Specify the type of alert to be triggered if the file’s access rights differ from the specified criteria. |
Step 3: Ownership
The following dialog box will be displayed if you previously selected the security option The user that owns the file.
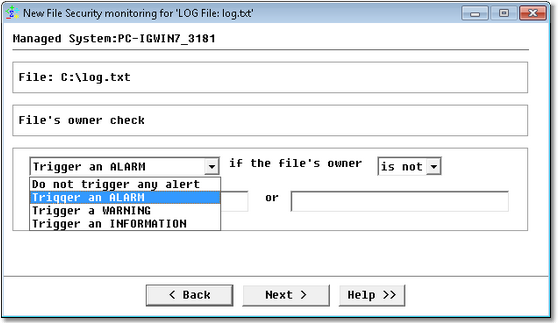
Windows Service Monitoring Wizard — File Ownership Page
| • | Select the type of alert: Do not trigger any alert; Trigger an ALARM; Trigger a WARNING; Trigger an INFORMATION |
| • | The file owner is or is not: Specify whether or not the file’s owner should or should not match the specified names. |
Once this option is configured, Monitoring Studio checks if the file’s owner is approved.
Step 4: File’s group
The following dialog box will only be displayed if you previously selected the security option The group that may have access to the file.

Windows Service Monitoring Wizard — File Group Page
| • | Select the type of alert: Do not trigger any alert; Trigger an ALARM; Trigger a WARNING; Trigger an INFORMATION |
| • | The file’s group is or is not: Specify whether or not the file’s group matches the specified criteria. |
Once this option is configured, Monitoring Studio checks if a group differs from the specified criteria.
Step 5: File’s integrity
The following dialog box will only be displayed if you previously selected the security option The file integrity. It lets you select the type of alert to be triggered when the file’s content is modified. The file integrity is verified using a checksum algorithm: MD5 on Windows, cksum on UNIX.
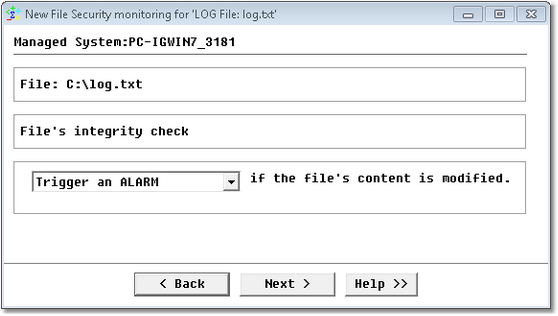
Windows Service Monitoring Wizard — File Integrity Page
Step 6: Monitoring Studio settings
Finally, you will have to configure the Monitoring Studio settings:
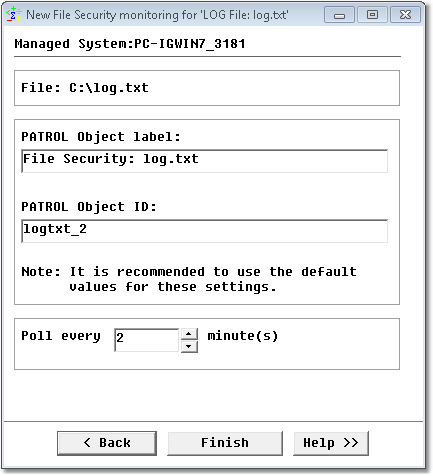
Windows Service Monitoring Wizard — Settings Page
| • | PATROL Object Label: Enter the Label displayed in the PATROL Console. |
| • | PATROL Object ID: PATROL internal identifier of this File security monitoring. It is strongly recommended not to change the default ID. |
| • | Poll every "x" minutes: Set the polling interval for this monitored object. The default polling interval is 2 minutes. |
See Also
File > Restart scan from start of file
File monitoring and analysis
File Security > Acknowledge alerts and update
SW_FILE_SECURITY
| 

