|
The first action you need to perform is to provide Monitoring Studio with the information related to the Host on which the technology you want to monitor is running. Once the Host settings are configured its instance is automatically created in TrueSight Operations Management.
The Host instance contains all the information about the server where the technology to monitor is running (hostname, system type, connection credentials, host availability check information, etc.).
 A Host instance is always listed under a Group instance. A Group can only contain one host. A Host instance is always listed under a Group instance. A Group can only contain one host.
To configure the connection settings for a host
| 1. | In the Monitoring Studio Configuration panel, scroll to the Host Settings section. |
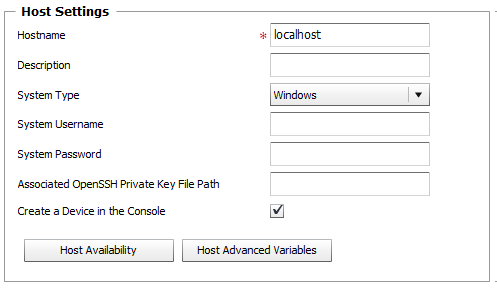
Host Settings Panel
| 2. | Provide the following information: |
| ▪ | Hostname: Enter the name (or IP address or Fully Qualified Domain Name) of the host on which the technology you wish to monitor is running. By default, Monitoring Studio offers to establish a connection to the server on which the PATROL Agent is installed (localhost). |
| ▪ | Optional — Description: Enter a unique description to easily identify the host during the configuration import process. |
| ▪ | System Type: Select the type of the operating system that is running on the host that will be monitored (Windows, UNIX/Linux, or Other). Select Other for any host that will not behave as a regular Linux or UNIX system would. For example, while a network device is likely to run a customized version of Linux of BSD, its restricted shell will not allow Monitoring Studio to use standard UNIX commands to perform the monitoring. |
Monitoring Studio requires you to specify the type of the operating system to avoid a costly identification phase and to offer more robust monitoring options.
| ▪ | System Username: Enter the username that will be used by Monitors relying on System Credentials to collect data from the targeted host. |
| ▪ | System Password: Enter the password for the username provided above, that will be used by Monitors relying on System Credentials to collect data from the targeted host. |
| ▪ | Optional — Associated OpenSSH Private Key File Path: When monitoring remote hosts running UNIX, Linux or other types of operating systems that support SSH authentication key file, you may need to provide an OpenSSH private key file to establish a secured connection with the remote host. Enter the path of the OpenSSH private key file you wish to use to establish a connection with the remote host and enter the optional PassPhrase in the Password field. |
 The Private Key File should exists on the PATROL Agent node. The Private Key File should exists on the PATROL Agent node.
When monitoring a local host, if credentials are not provided, Monitoring Studio will use the default PATROL Agent account. For remote monitoring, System Credentials are mandatory for the Monitors listed below; failing to provide this authentication information will prevent the solution from collecting any data for:
| ▪ | Windows Performance Counters |
| ▪ | Create a Device in the Console: Select this option if you wish Monitoring Studio to create an instance of the device in TrueSight Operations Management. All associated Monitors and their events and attributes will be attached to this new device in TrueSight Operations Management. If this option is not selected, they will be attached to the device matching the PATROL Agent host. |
| 3. | Optional — Configure the Host Availability Check: |
| ▪ | Select the method(s) Monitoring Studio should use to test the availability of the monitored host: |
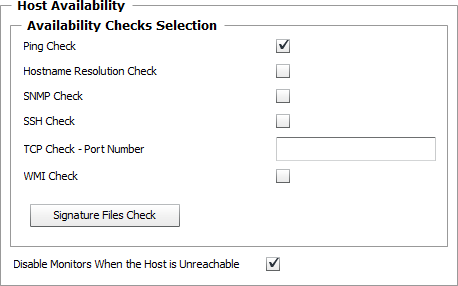
Host Availability Check Settings
| ✓ | Ping Check: Default option. Select this option to have Monitoring Studio ping the monitored host up to four times in a row. To be successful, the targeted host must respond to at least one ping command during each collection cycle. |
| ✓ | Hostname Resolution Check: Select this option to have Monitoring Studio resolve the hostname of the monitored host to an IP address. |
| ✓ | SNMP Check: Select this option to have Monitoring Studio check the monitored host availability via an SNMP session. For the SNMP availability check to be successful, the targeted host must respond to a "GETNEXT" request on either the OID 1.3.6.1 or the OID 1.3.6.1.4.1. |
 It is necessary to provide the SNMP settings information for the SNMP check to be performed. It is necessary to provide the SNMP settings information for the SNMP check to be performed.
 if the PATROL Agent configuration variable "/snmp/support" value is not "yes" an error message will be reported through the Collection Error Count attribute under the Monitor Group object. The SNMP check will not be performed. if the PATROL Agent configuration variable "/snmp/support" value is not "yes" an error message will be reported through the Collection Error Count attribute under the Monitor Group object. The SNMP check will not be performed.
| ✓ | SSH Check: Select this option to have Monitoring Studio check the targeted host availability (UNIX, Linux, or other systems) via the SSH protocol. For the SSH availability check to be successful, Monitoring Studio must be able to connect to the host using the provided System Credentials (required in the Host Settings). |
| ✓ | TCP Check - Port Number: Use this option to have Monitoring Studio check the targeted host availability via a TCP connection. You must provide a port number for the TCP connection. |
| ✓ | WMI Check: Select this option to have Monitoring Studio check the monitored host availability via the WMI protocol using the provided System Credentials (to use towards Windows-based host only). |
| ✓ | Signature Files Check: Click to open the Signature Files Check dialog box. If at least one of the signature files is present on the targeted host, the check is considered successful: |
| . | Provide the name and full path of the signature file on the targeted host. |
| . | Click the Add to List button to complete the configuration of the Signature File Check. |

Signature Files Check Settings
 Wildcards are not supported in signature files Wildcards are not supported in signature files
| ▪ | Disable Monitors When the Host is Unreachable: Select this option if you wish Monitoring Studio to disable the monitoring of all the technology instances monitored on the target host. If any of the selected host availability check fails, note that the monitoring will resume automatically when the host becomes available again. |
| ▪ | Enter the Name and Value of the configuration variable you need to configure. |
| ▪ | You can easily modify or remove a variable by selecting it in the list and clicking either the Modify Selection or the Remove from List buttons. |
The Variable field is case sensitive.
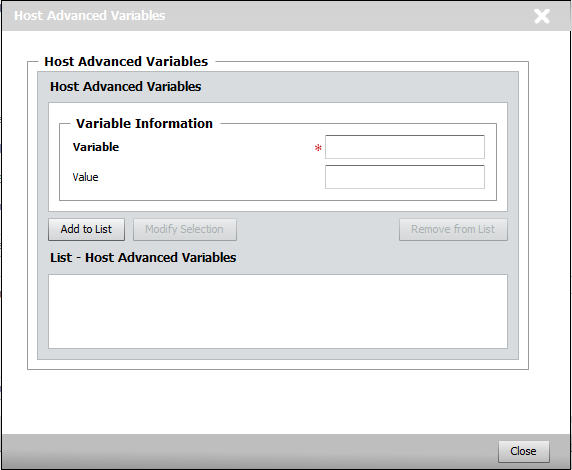
Host Advanced Variables
These variables should only be set when instructed so by Sentry Software Support.
You are now ready to configure your Monitor Group.
See Also
Host and Group Specific Configuration Variables
| 

