-
Home
- Studio
Hosts and Templates
To monitor technologies or applications with Monitoring Studio X, you need to:
- Define the host(s) on which the technology or application to be monitored is installed
- Create monitoring templates
- Apply the monitoring templates to the relevant host(s).
These operations are performed from the Studio menu of the Monitoring Studio X Web interface.
Step 1: Defining Hosts
Host Type
Hosts define the systems to be monitored with Monitoring Studio X and can be of three types:
- Linux/UNIX
- Windows
- Other
The Templates available for hosts depend on both the host type and the template type:
- Templates for All Systems apply to any host type
- Templates for Windows Systems apply to Windows hosts only
- Templates for Linux/UNIX apply to Linux/UNIX hosts only.
The list of available Monitors will depend on the host system type.
Multiple Hosts
Monitoring Studio X allows you to monitor several hosts that share the same characteristics (system type, credentials, templates, etc.) with one single host configuration object by simply adding the hostnames to the host configuration object.
Hosts can either be added one at a time or in bulk. To add hosts in bulk, you will have to enter a list of hostnames (one entry per hostname) using one of the three formats supported:
# Comments are ignored
# Hostname BMC TrueSight/Helix Device FQDN
node01-clusterA clusterA.acme.com
172.16.8.200 clusterA.acme.com

# Hostnames Only
node01-clusterA
172.16.8.200

# Hostname,BMC TrueSight/Helix Device FQDN
node01-clusterA,clusterA.acme.com
The same hostname/IP address may be used across multiple Hosts. FQDNs are used to create the devices in BMC TrueSight/Helix. FQDNs are optional but, when provided, their number must match the number of hostnames.
Each specified hostname will be monitored independently in the Console and in BMC TrueSight/Helix with a separate Host instance.
This feature is particularly useful when monitoring lots of similar hosts.
Host Properties
| Field | Description |
|---|---|
| Display Name | Name to identify the host instance in BMC TrueSight/Helix Operations Management. |
| Internal ID | ID to be used to store the Host configuration in the PATROL Agent configuration. This Internal ID is automatically generated based on the defined Display Name. This ID can be edited, if needed. Only alphabetical, numerical and special characters -_. are supported. |
| System Type | Operating system running on the host to be monitored. The System Type is either Windows, UNIX/Linux, or Other. |
| Hosts | List of Hostnames or IP addresses of the hosts to be monitored and their associated BMC TrueSight/Helix Device FQDN. |
| Place Host Under a Host Group | If checked, the host(s) will be created under a Host Group (X_HOSTGROUP class). This is usually used to group multiple hosts under a single instance. |
| System Credentials | System Credentials are the default credentials used by the Monitors to perform operations on the monitored host (connect with SSH, or WMI on Windows, get the list of processes, etc.). While optional, it is recommended to provide valid system credentials. |
| SNMP | (Optional) Enable SNMP if this protocol will be used for monitoring or availability check. You will then have to specify the SNMP version (SNMP v1, SNMP v2c, SNMP v3 - No Authentication, SNMP v3 - MD5 Authentication, or SNMP v3 - SHA Authentication) and its corresponding settings. |
| Availability Check | (Optional) Checks to be performed to assess the availability of the host. |
| Collect Schedule | (Optional) How often new data is collected. A new collect can be performed from once every second, to once in a day. By default, the collect schedule is set to 2 minutes. |
| Parameters and Alerts | (Optional) Alerts to be triggered when the Host availability status is Unknown or Unreachable. |
Once saved, the corresponding X_HOST instance will appear in the Console. If the configured Host contains several hostnames, several instances will be created.
Step 2: Defining Templates
Creating a Template
Monitoring Studio X allows you to design templates to monitor devices, systems or applications on several hosts. Templates are attached to one or several hosts. A template can be applied multiple times to the same host. Templates contain the list of monitors to assess the health and performance of the targeted technology or application (CLIs, REST API, SNMP, WBEM, JDBC, etc.) and additional credentials.
To create templates, select the Studio menu, click New Template… and provide the following information:
| Field | Description |
|---|---|
| Template Name | Name of the technology you wish to monitor (for example: MySQL Server, Huawei OceanStor 9000, Skype for Business, Veeam Backup, etc.) |
| Internal ID | ID to be used to store the Template configuration in the PATROL Agent configuration. This Internal ID is automatically generated based on the defined Template Name. This ID can be edited, if needed. Only alphabetical, numerical and special characters -_. are supported. |
| Applies to Host System Type | Host system type to which the template will apply (Linux/UNIX only, Windows only, or All systems). This setting can not be modified later if the configured Monitors are compatible with this specific host system type. |
| Disable Template | Turned OFF by default. Turn ON to disable the template. |
| Required Credentials | Declare the credentials to be used by the Monitors to assess the health and performance of the targeted technology or application. If, for example, you are creating a mySQL monitoring template, you can declare the db_admin credentials that will be used by each monitor to run queries. Although the Required Credentials will be set at the Host level, you can specify a default username and password to be used. |
| Macros | Macros defined in a Template can be used in its Monitors in the form of %{MACRO_NAME}. The value of macros can be customized when configuring the monitoring of Hosts. Refer to Working with Macros for details. |
| Embedded Files | Text files that are stored in the Template itself and that can be referenced to by its Monitors, typically the Command Line and the Nagios Plugin Monitors. Such Monitors will reference an Embedded File with this syntax: %{FILE:filename}. This allows you to embed shell scripts or even Nagios plugins in the Template itself. Monitoring Studio X will copy the file to the monitored Hosts as a temporary file. Only text files are supported. |
| Database | (Optional - Database Monitoring Only) Type of database used by the Database Query Monitor. Possible values: No Database, IBM Informix Server, Microsoft SQL Server, MySQL Server, Oracle Database Server, PostgreSQL, Other Database. |
| HTTP Request | (Optional - HTTP Request Only) By default, the HTTP Request Monitors Share Cookies option is enabled (ON). This option is required when several HTTP Request Monitors need to share a session, typically with authentication. |
| Parameters and Alerts | (Optional) Enabled (ON) by default. This parameter reports all collection-related errors that occur during the collection process of the Template and its Monitors and prevent Monitoring Studio X from monitoring properly. To avoid maintening a large number of errors, you can set the duration after which errors will be aknowledged and the counter reset when no new errors are encountered. |
Adding Monitors
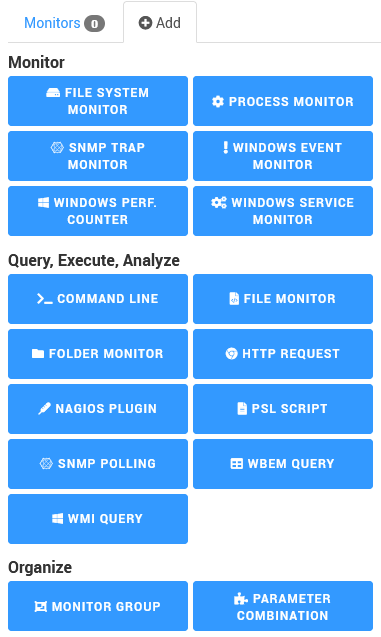
You need to associate one or several Monitors to your Template to define the monitoring actions you want to perform.
Click the Add button next to the Monitors' tab and select a Monitor.

Refer to Basic Monitors, Monitors with Content, Content Parsing Monitors, and Dynamic Instances to learn more about the available Monitors and how to configure them.
Once the above information is provided, click Save. You can then apply your Template to your hosts. An instance of the X_TEMPLATE class is created each time a host is set to use the Template.
Exporting a Template to BMC TrueSight/Helix
You can download a Template and all its Monitors as a configuration file that can be imported into a BMC TrueSight/Helix policy.
In the policy, simply configure the Monitoring Studio X solution to use the Template for monitoring a specific list of Hosts (including credentials).
Importing a Template
You can save configuration time by importing an existing template that can be deployed on a different Agent.
To import a template, select the Studio menu, click Import Template, then locate and select the template you wish to import. The template, including all its properties, will automatically be listed in the Studio > Template page and ready to use.
Monitoring Studio X verifies that the Internal ID of the imported template is unique. If a conflict occurs with an existing Internal ID, you will be prompted to change the template's name before being allowed to import it.
From the Studio page, click TEMPLATES ON GITHUB to access a large offering of free-to-use Monitoring Studio X Templates.
Step 3: Applying Templates to Hosts
To apply templates to hosts:
- In the Monitoring Studio X Web interface, select the Studio menu.
- In the Monitored Hosts section, click the Host to which you wish to apply templates.
- In the Templates section, click Add a Template and select the Template you wish to apply to the host. If a Template does not appear, verify that the value set for the System Type of the host is the same as the one set in the Applies to Host System Type field while configuring the Template.
- If the Template has already been applied to the host, provide a Tag to identify the Template and to differentiate it from the other Template(s). The Tag appears in the Template's label and ID.
- If Required Credentials have been declared while configuring the Template, set the Username and Password to be used by the Monitors to assess the health and performance of the targeted technology or application.
- If Macros are declared in the Template, enter their value.
- Click Save
Additional Information
Availability Checks
Availability checks are verifications to be performed to assess the availability of the host. You can combine any of the following options.
| Check | Description |
|---|---|
| Hostname Resolution | Resolves the hostname of the monitored host to an IP address, or perform a reverse lookup on the specified IP address. If an IP address is specified, this check reports the Host as unavailable when the reverse lookup fails. This is to ensure that the corresponding FQDN can be retrieved and exposed to BMC TrueSight/Helix. |
| Ping | Pings the monitored host. For the Ping check to be successful, the targeted host must respond to at least one ping command during each collection cycle. |
| SNMP | Performs an SNMP query. For the SNMP Availability Check to be successful:
/snmp/support value must be set to
yes
|
| WMI | Performs a simple WMI query on the monitored host. |
| TCP | Connects to the specified TCP port. The check will fail in nothing is listening on the remote port. No data is actually sent and the connection is closed immediately. |
Credentials
Credentials required to perform certain monitoring operations, like a database connection, or a REST authentication, are declared at the Template level for all its related Monitors.
Unless a default username and password have been set in the Template, you will be asked to provide a valid username and password when applying the Template to the Host. Credentials are therefore declared at the Template level and configured at the Host level.
Monitors may not require template-specific credentials and can always use System Credentials, which are available for all monitored hosts.
Databases
To monitor an application with a database, a Template might need to perform SQL queries. In that case, the required credentials would have to be declared and the database type specified at the Template level. You will only be able to create Database Query Monitors when the database type is specified.
You will be asked to provide the database connection settings when applying the Template to the Host.
Embedded Files
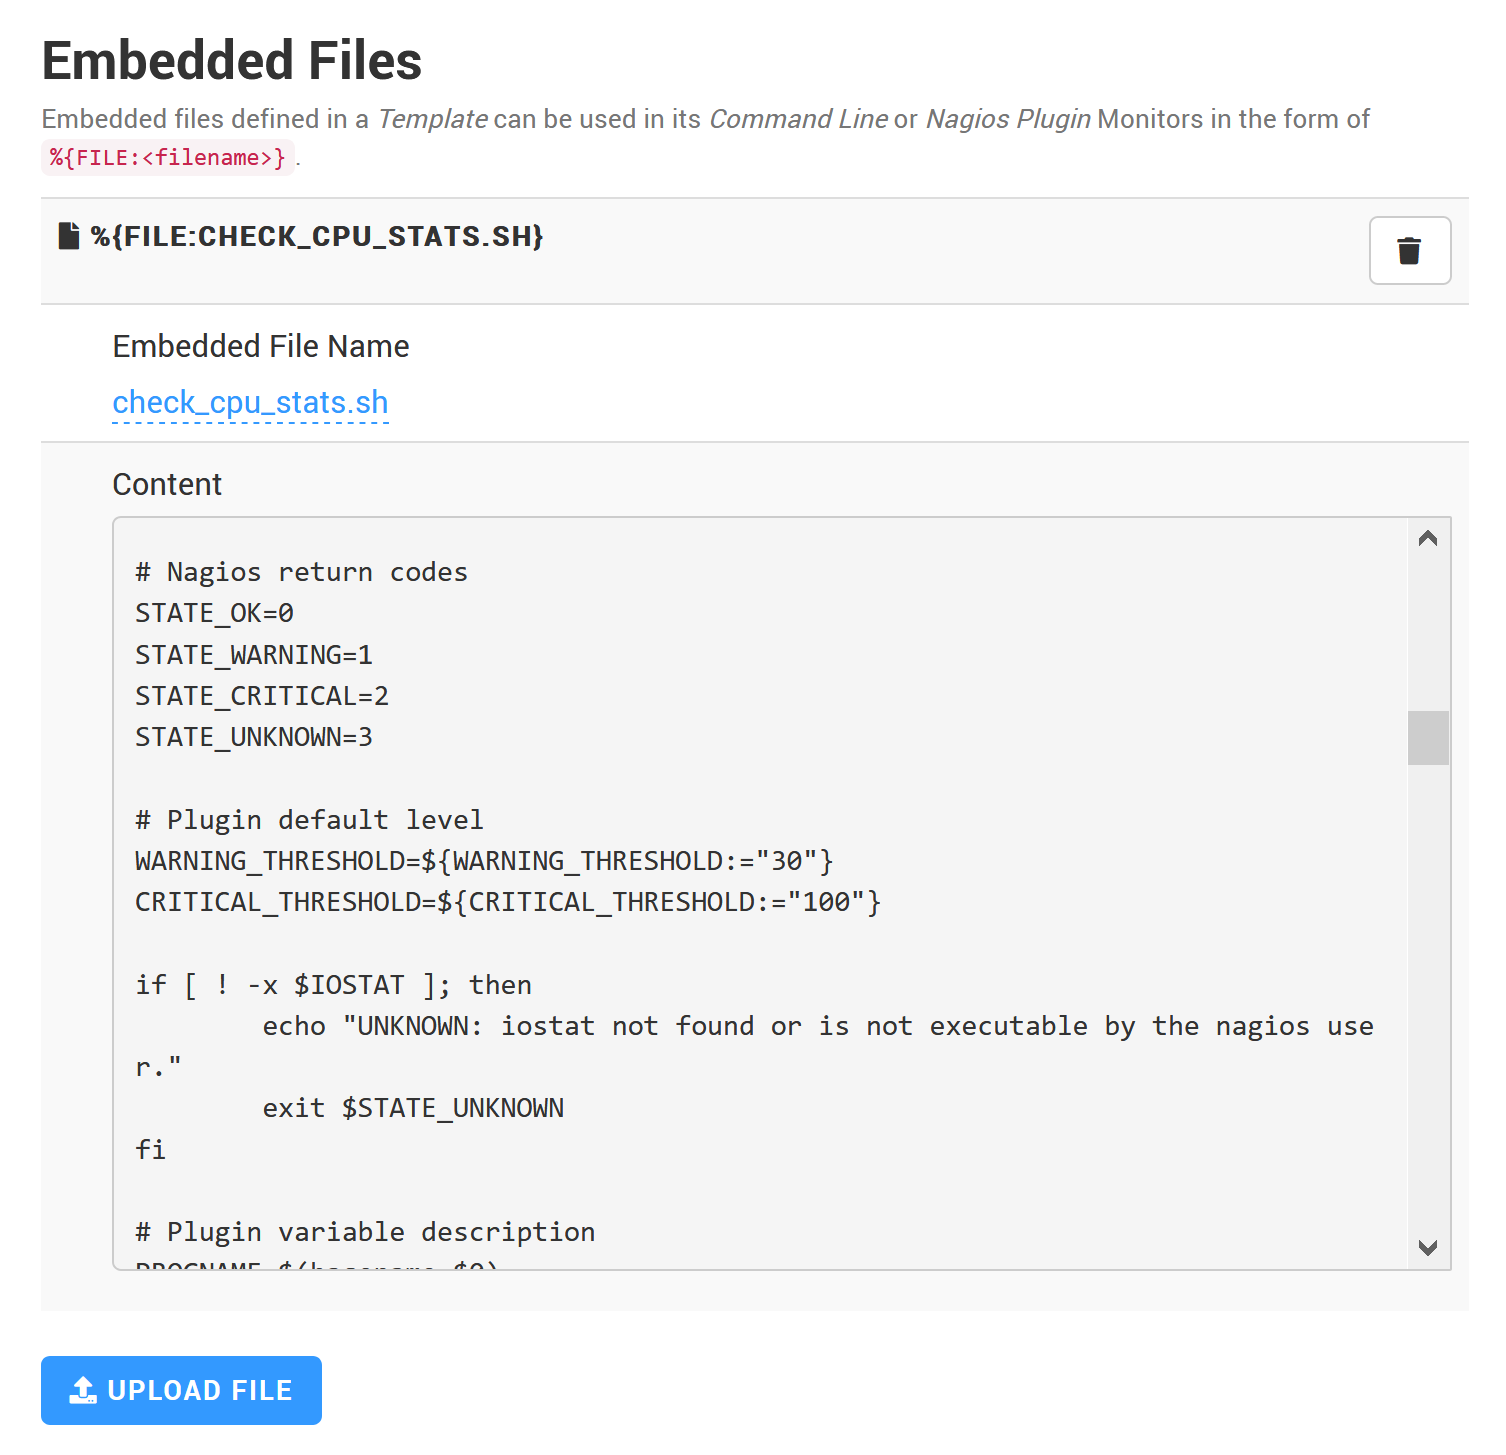
Embedded Files are text files that are saved in the Template configuration itself (i.e. as a PATROL configuration variable). If Monitors in the Template require a file (like a script file to be executed, for example), using Embedded Files makes sure the file is distributed along with the Template configuration (through BMC TrueSight/Helix policies, or just with a classic configuration export).
Embedded Files can added and edited, or uploaded at the Template level:

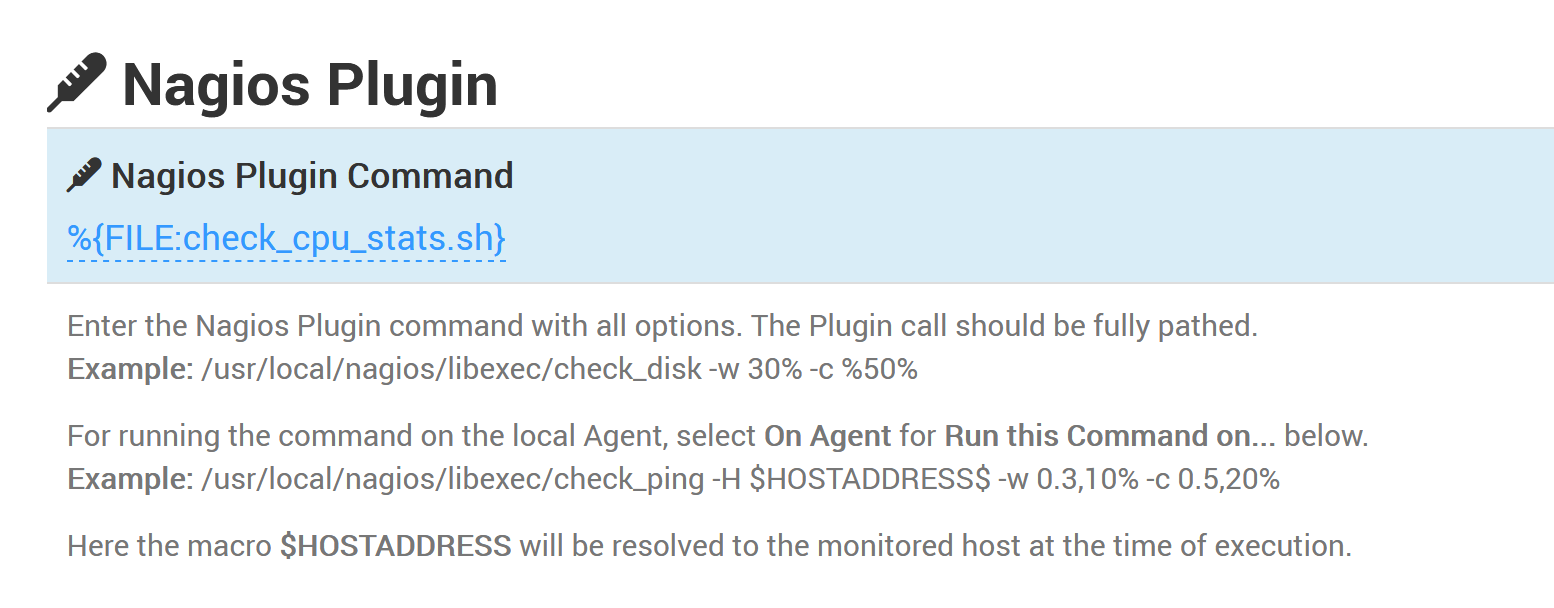
and referred to from a Monitor with the %{FILE:<filename>} macro:

When the Template is used to monitor a Host, its Embedded Files are stored in a temporary directory. When the Monitor is run, the %{FILE:<filename>} macro is replaced with the path to the corresponding temporary file.
The Monitors listed below support the %{FILE:<filename>} macro:
- Command Line
- Nagios Plugin
Example:
To execute the check_cpu_stats.sh script, you first need to add it as an Embedded File to the Template. Then, you can create a Nagios Plugin Monitor with the command line: %{FILE:check_cpu_stats.sh}
Macros
Macros are special variables that are declared in the Template and that can be customized for each Host. Macros are particularly useful when designing templates that will apply to slightly different environments.
You can for example declare a PATH macro in the Template. All the Monitors (typically File, Folder or Command Lines) in this Template can use this %{PATH} macro.
Unless a default value was provided in the Template, you will have to specify the value of the macros when applying the Template to a Host.
Refer to the Macros section for details.