-
Home
- Getting Started
Installing Monitoring Studio X
Installing Monitoring Studio X in your BMC environment can be performed by using the BMC Utility Package or by importing the monitoring solution into BMC TrueSight/Helix. In both cases, you need to:
-
make sure that Java 1.8.00 or higher and a Java Runtime Environment (JRE) are installed on the same system that runs the PATROL Agent. You can download the Java Runtime Environment along with the KM on the Sentry Software Website
-
have installed and properly configured a PATROL Agent version 9.5 or higher
Installing the KM
Using the BMC Utility Package
-
Download and extract the BMC Utility Package according to the platform you plan to install the solution on:
- For UNIX/Linux systems:
ins_ALL_<version>.tar - For Windows systems:
ins_WINDOWS_<version>.zip
- For UNIX/Linux systems:
-
Download and extract the appropriate Monitoring Studio X package according to the platform you are using:
-
For UNIX/Linux systems:
monitoring-studio-<version>-thorium.tar -
For Windows systems:
monitoring-studio-<version>-thorium.zipNote: The packages are valid for all the PATROL components: Agent, Console, Console Server, etc.
-
-
Download and extract the Java Runtime Environment package according to the platform you are using, if you want to install the JRE along with Monitoring Studio X:
jre_LINUX-SOLARIS_<version>.tar - JRE <version> for Linux Solarisjre_WINDOWS_<version>.zip - JRE <version> for Windows
-
Browse to the bmc_products folder where the files have been extracted and launch the setup.exe program (Windows) or setup.sh script (UNIX)
-
Follow the standard step-by-step installation procedure (see BMC Documentation for details). At the Products and Components to Install step:
- select the monitoring solution:
Monitoring Studio X <version> - select the JRE:
Oracle Java <version> for <OS>program if you want to install it along with Monitoring Studio X (this option is only provided when you have previously downloaded the package)
- select the monitoring solution:
-
Continue the installation process until it is complete.
Using TrueSight
Installing Monitoring Studio X through TrueSight is a 3-step process that consists in:
- importing the monitoring solution
- creating the installation package
- installing the package
Step 1 - Importing the Monitoring Solution
The TrueSight Central Monitoring Repository may include the current versions of Monitoring Studio X that you can use with BMC TrueSight. If the version available in the Repository does not correspond to the latest one, you will have to manually import it:
-
Log on to the TrueSight Central Monitoring Console
-
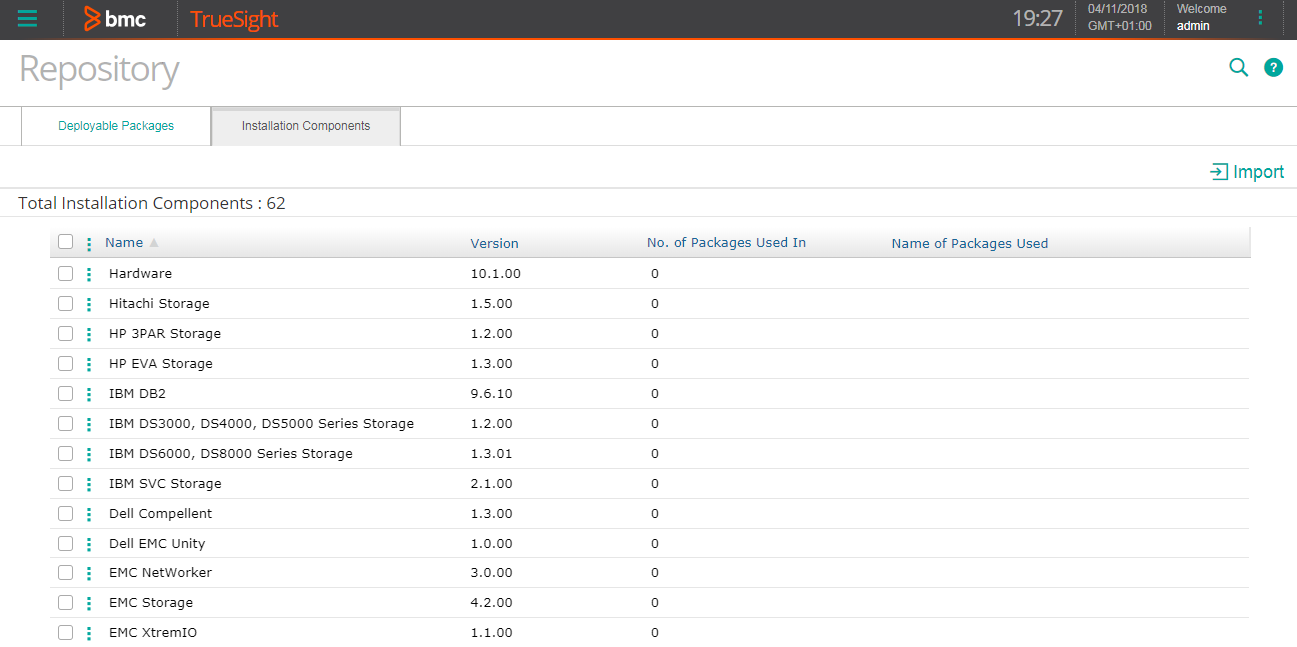
In the navigation pane, select Administration > Repository
-
Click the Installation Components tab
-
Check that the version of Monitoring Studio X is actually the latest one. If it is, you may skip this step. Otherwise, download the latest version of the Import to BMC TrueSight Operations Management package (
monitoring-studio-<version>-thorium.zip) available on Sentry Website and store it on the local computer from which you are running Central Monitoring Administration -
Click Import
-
Select Single solution
-
Browse to the Import to BMC TrueSight Operations Management package
-
Click Import. The selected archive file is imported to the repository and extracted
-
When the selected archive file is imported to the repository, click Close.

Step 2 - Creating the Installation Package
You can create the installation package that will be deployed to the managed systems directly from TrueSight Presentation Server:
-
Log on to the TrueSight Console
-
From the navigation pane, select Administration > Repository
-
Click the Deployable Packages tab
-
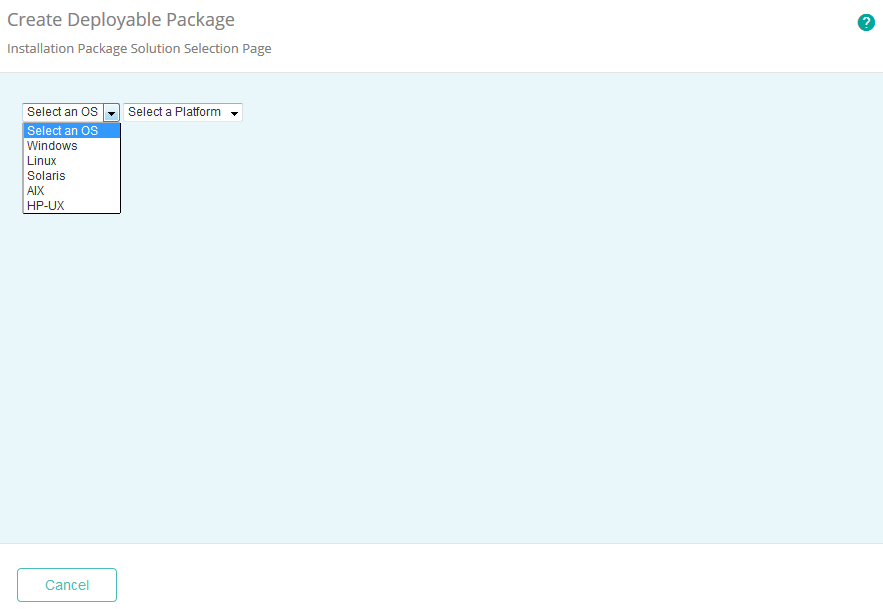
Click Create a Deployable Package
-
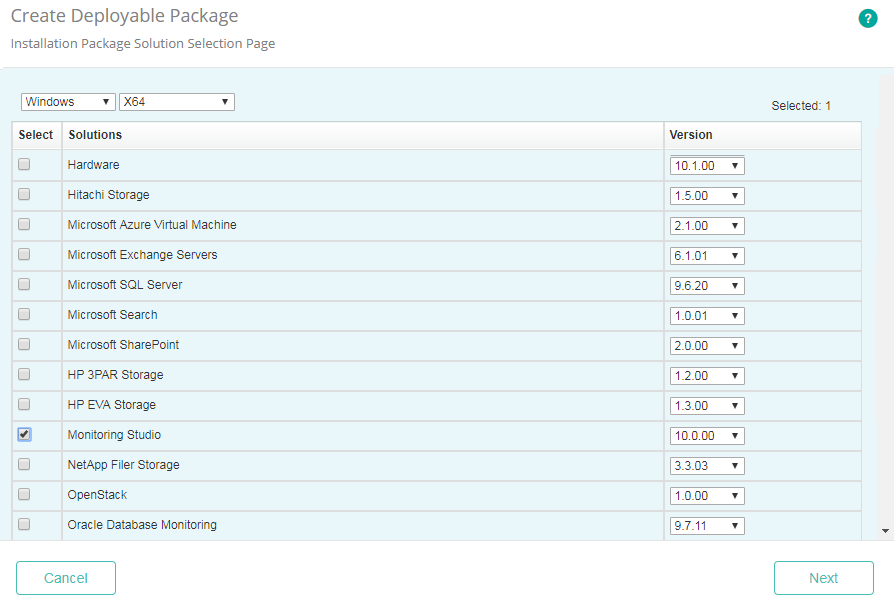
Select the operating system and platform for which you want to create a package. The components available in the repository for the selected operating system and platform are displayed
-
Select the Monitoring Studio X solution to be included in the package, specify its version, and click Next
-
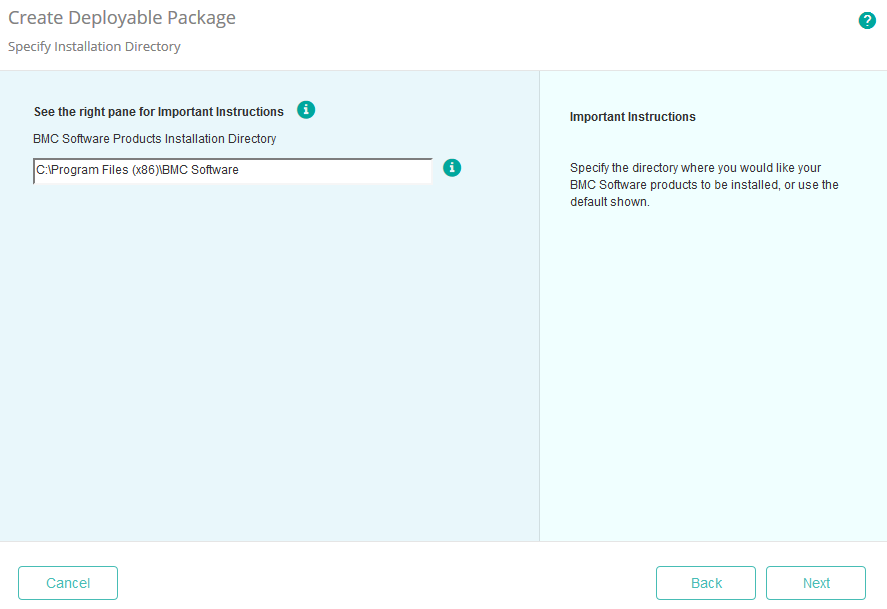
Specify the Installation Directory and click Next
-
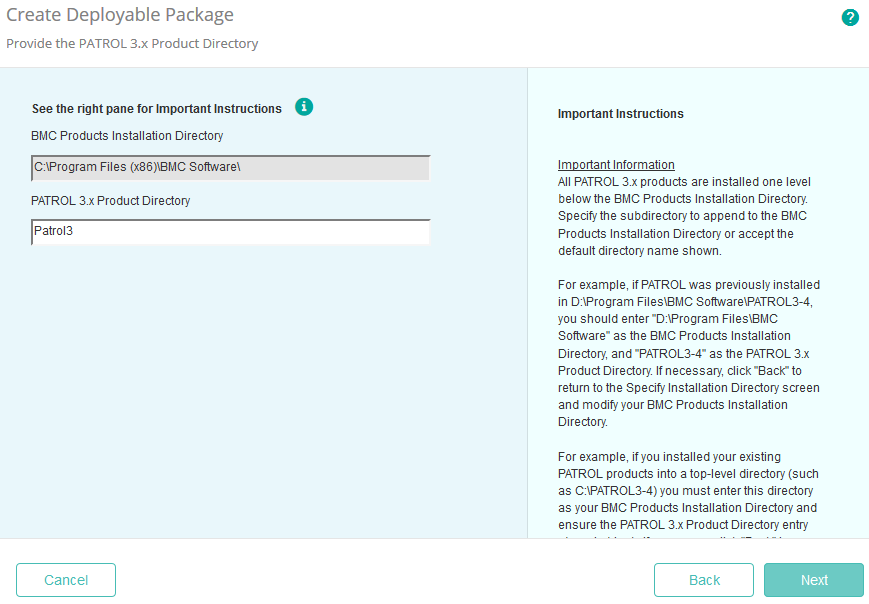
Provide the PATROL 3.x Product Directory and click Next
-
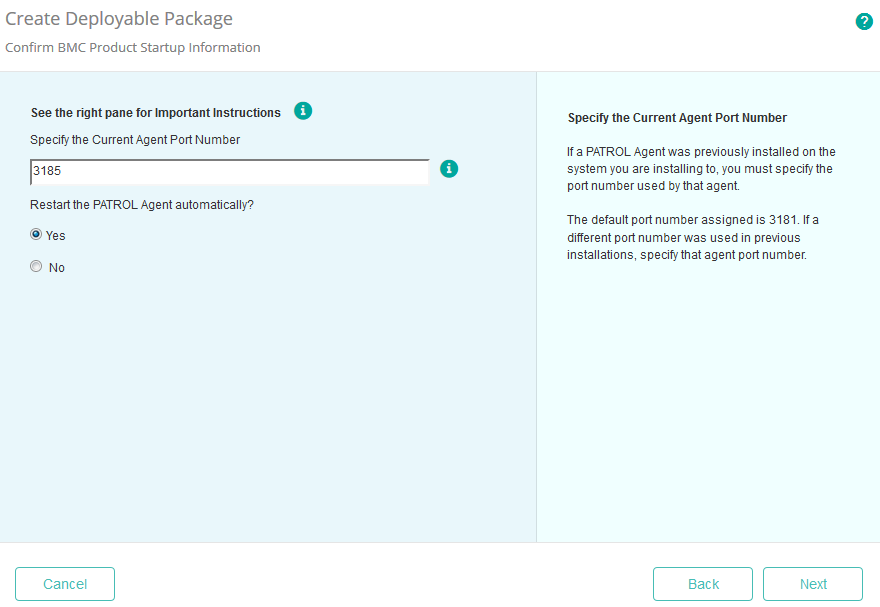
Specify the BMC Product Startup Information and click Next
-
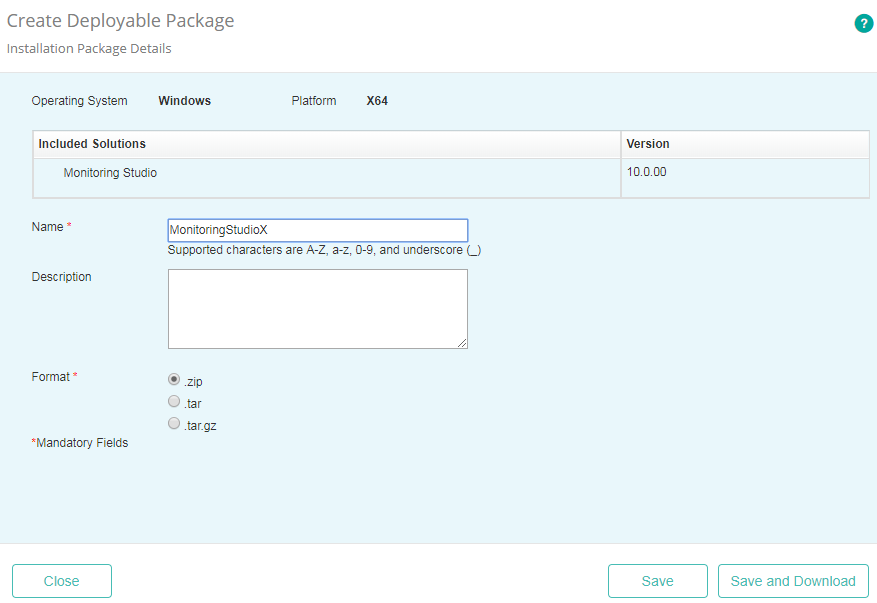
Provide the following information:
- Name: Enter a unique name for the package
- (Optional) Description: Enter a description of the package
- Format: Select a file compression format for the package
-
Click Save
-
Click Close. The package is now available in the Deployable Packages list.


Step 3 - Installing the Package
-
Log on to the TrueSight Console
-
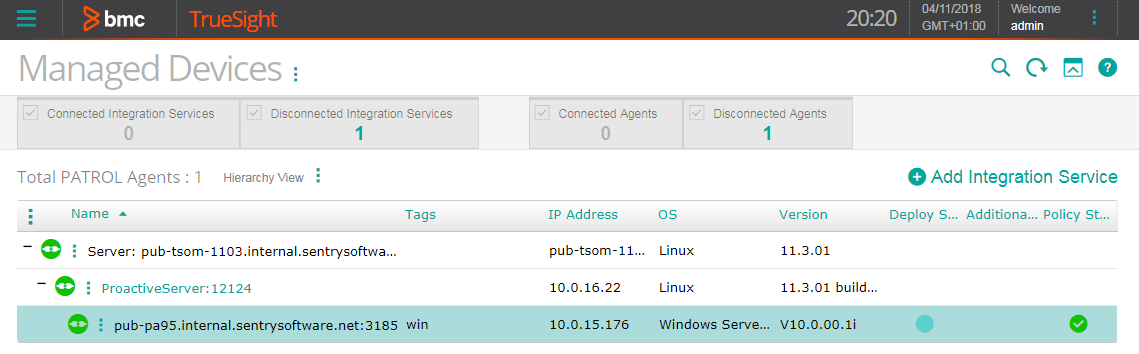
From the navigation pane, select Configuration > Managed Devices
-
Locate the managed device on which you wish to install Monitoring Studio X, click its action button

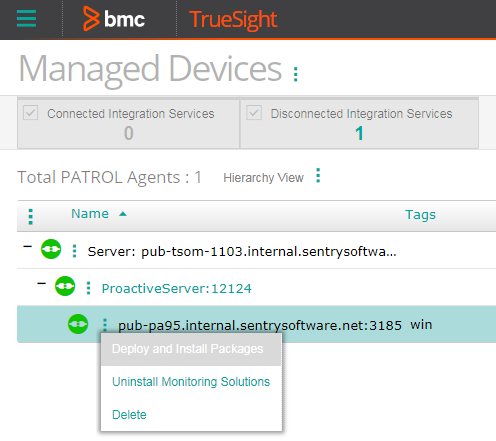
-
Select the Monitoring Studio X package and click Deploy and Install

-
Wait for the installation to complete. You can click the


